| | | |
|
|
|
|
|
|
|
|
|
|
|
|
|
|
|
|
|
|
|
|
|
|
|
|
|
|
|
|
|
|
|
|
|
|
|
|
|
|
|
|
|
|
|
|
|
|
|
|
|
|
|
|
|
|
|
|
|
|
|
|
| | | |

pages vues |
|

|
 Create your own thumbnail buttons for DVD menus with Avid Studio | edited on 7th October 2012 |
|

Topic ! |
Pinnacle Studio 16 (just like his father, Avid Studio) offers a large amount of buttons to customize your DVD menus. If it is relatively easy to create new navigation buttons directly in the DVD menus editor of Pinnacle Studio 16, simply by dragging an image on your menu and by setting the button property, there was no known solution to create additional thumbnail buttons that would be added to the collections provided with the software.
This tutorial will explain step-by-step how to add a thumbnail button (ie a button containing a small size video that announces a chapter) to the default list of Pinnacle Studio 16 using the online tool proposed on this site!
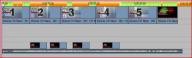
The figure below shows the first buttons (using alphabetic order) present in the collection. This tutorial will create the "20cents Logo" button, which will therefore be added in the first position of the list (because grading is done alphabetically ...)
|  |
| Creating orginal DVD menu in 3 steps ! |
 |
 |
 |
|
 |
| Step 1 : making the frame |
Step 2 : using the frame to built the button |
Step 3 : making your menu DVD using buttons |
This tutorial will teach you how to overcome the 2 first steps !
| |
| Defining the shape of your button : Step 1 |
For this tutorial, I'll create a button by using the shape of my logo. The same tutorial can be reproduced with all kinds of shapes or frames that you either create or find on the internet.
We will start by creating an outline that will give the shape of the button, its decoration, and which will provide a mask for the video thumbnail that there will be housed.
For this, once again, I advise you to use Paint.NET. This tool is free, easy to use, and quite efficient to edit images.
In Paint.Net, open an image that will be used for template, here, I would use my own Logo displayed just below.
|  |
| Step 2 |
The image is now in Paint.Net. Then, we will erase the outside black background. To do this, nothing more simple, we will use the magic wand
First, click the magic wand in the tools menu, and then click anywhere in the black background. Paint.Net will select all the contiguous pixels using this color. Now, delete it by using the "Delete" key on the keyboard.
Nota : A small slider in the toolbar will allow you to adjust the "distance" between the colors of the pixels in the image to be selected compared to the color of the selected pixel. This is very handy to select areas that are not completely uniform color.
|  |
| Step 3 |
Now we will extrude the Interior of the shape. To do this, I will use the "lasso" tool. The tool requires a bit of practice, but by using part by part, this takes only a few moments.
- You select a first part, and then you delete it with the 'Delete' button (and not the "backspace" key which has the function in Paint.net to fill the selection with the current color !).
- Repeat until having fully extruded your frame.
After some effort, here is what I get ...
|  |
| Step 4 : small secret beetween friends ... |
Pinnacle/Avid used a few tricks in the files used to define thumbnail buttons. Indeed, the frame file has to 2 functions. Firstly, it provides a decorative frame and secondly, it defines the mask for the thumbnail (to be clear, it defines the area in which the thumbnail will be displayed)...
On one hand, the thumbnail will be apparent everywhere the mask is not fully transparent, but it will still be affected by the level of transparency of the mask.
On the other hand, the frame must not hide the thumbnail, it should therefore be transparent where the thumbnail will be visible...
How to solve this paradox?
It is by looking at the .TGA files delivered with different menus that I discovered how to make...
Outside of the frame, pixels must be transparent (value to 0 for the Alpha component that handles transparency), and erasing this areas (with the delete key) has reached this goal...
For the Interior of the frame, we must fill it with the following color (Red: 255; Green: 0; Blue: 255; Alpha: 3). It seems that this color is interpreted by Studio to define the reception zone for thumbnails !
- First, open the 'Colour' (menu Tools/color) tool, and display additional parameters by clicking on the button "more »".
- There, define your color (Red: 255; Green: 0;. Blue: 255; Alpha: 3) setting each components R, V, B and Alpha transparency
- Finally, select the thumbnail area using the magic wand, and apply this color on the selection with the backspace key (and not the delete key that would fill the selection with the transparent color)
|  |
| Step 5 : Save your file ... |
Ther is still to save the file by giving it the name of your choice, in my case 20cents Logo.png* . Of course, don't forget to save it in 32-bit format to preserve the essential component of transparency 
|  |
| Step 6 : create your thumbnail button |
Your frame is now created, the hard part is done. Now we'll create the thumbnail button using the online tool present on this site.
Reminder: the use of this tool is restricted to registered visitors. It is of course free. By using this tool, you agree to share your thumbnail buttons throught this website online library with other registered visitors free of charge.
For that, select (Menu DVD Menu Buttons/import) on this website, and select your file in the dialog box at the bottom of page and then click on OK .
If you have followed this tutorial, after a moment, the page refreshes with in addition the preview of your button.
Notice: the tool will set your buttons to have a correct geometry in 16/9 format projects. If you're still a userr of the 4/3 format, you will need to extend horizontally button when using them.
|  |
| Step 7 : Download your button (and plenty of other !) |
Your button has been integrated at this website library of free thumbnail buttons.
So, you will be able to download it, as well as other button that you could need...
To do this, go in the library of DVD menu buttons (menu DVD Menu Buttons / Library). The buttons there are sorted in reverse order of creation, so the newer buttons are at the top of page!
According to this website audience, your button is likely to be in first position!
- Select the checkbox for your thumbnail button, and optionally, check any other buttons that you like to get.
- Then click on the download button.
- This triggers the download of a zip file having for name your connection pseudo.
- Depending on your browser, the file will be downloaded in the default download directory (with firefox, this is defined in menu Tools/Options / then general tab , with internet explorer you can directly specify the directory for each download). In any case, copy the downloaded file to the directory C:\Users\Public\Documents\Pinnacle\Content\Buttons
- with 7-zip unzip the files using the option Extract here (important
 ). ). - This will create a sub directory Tumbnail Buttons that will contain all the files needed to define the new thumbnail buttons.
- If it is not already done, start Pinnacle Studio 16 or Avid Studio, and wait a few moments for buttons import into the library
|  |
| Here it is ! |
... It is done, you just add new possibilities to your favorite editing software 
|  |
| How to cancel a button from the online library ? |
But, if I did not follow correctly this tutorial and I put online an missed button, is it possible to erase it?
Of course Yes!
In the thumbnail button library, You will see a small red cross next to the buttons that you have already created (and only those). Click it, and the button will be erased from the server. You will be able to recreate it keeping the same name after having done your corrections.
|  |
| And Now ? |
There is not need to download all the buttons of this library, as this could overload the list and make difficult to find what you are looking for.
Just come from time to time to see the new creations and choose what can be helpful for your work !
|
| |
|
You may also find interest into following tutorials ... | 
seen 194225 times | how to install 20cents montage themes |
| 
seen 47015 times | import an animated gif into Avid or Pinnacle Studio |
| 
seen 16846 times | Animated GIFs for Avid and Pinnacle Studio |
| 
seen 11613 times | save tutorials in PDF format |
| 
seen 7234 times | Rate montage theme series |
|
|
|
|
|
tutorial seen  time time |
|
|
| 
seen 57328 times | Amicalement-Votre | |
| 
seen 15404 times | Create thumbnail buttons for DVD menus | |
| 
seen 71600 times | Pinnacle Studio 16 video edition assesment by 20cents-video | |
| 
seen 15818 times | Realize CSI Miami generic with Avid or Pinnacle Studio | |
|
seen 7234 times | Rate montage theme series | |
| 
seen 12596 times | Clone a theme with Avid Studio | |
| 
seen 24476 times | travel itinerary | |
|
|
Perfect your shooting technique
Thierry Philippon, who manages www.magazinevideo.com has created two training DVDs (the only existing in Europe) offering to video amateur examples and practical techniques for their families and travel movies. Entitled "The best technics of professionals for your stories and movies travel", DVDs are available in Beginner & Intermediate or Advanced level. These DVDs are made for video enthusiasts who have some basic video skills and willing to progress but also to those who use a camera or iPhone, and want to discover the video capabilities of their device. Thanks to the contribution of the moving image, the container and contents are in line here. The same situation is sometimes approached with the "bad" example in addition to "good" example. The location of the cameras or the cameraman, making of is also presented when needed.
A free module is available to give you a better idea of the content of these DVDs.
|
Web site of the month !
Original motion backgrounds for your DVD menus and montage theme animation
Dreamscene.org propose you many free high quality screensaver. Even if these files were made to be used as PCs screen saver, their installation kit content .wmv video files that you will be able to import into Studio, either for your DVD menus, or, after some adaptations, in my montage themes ...
Go ahead, you will enjoy, and it's very nice !.
|
|
|
|
|
|